Initialize the SDK
The OneTrust SDK retrieves an object that contains all the data needed to present a UI to a user to collect consent for the SDKs used in your application. The data returned is determined by the configurations made in the OneTrust Admin console.
Update the SDK Keys
- Navigate to the file where you will update SDK keys and values.
- Xamarin.iOS - Navigate to
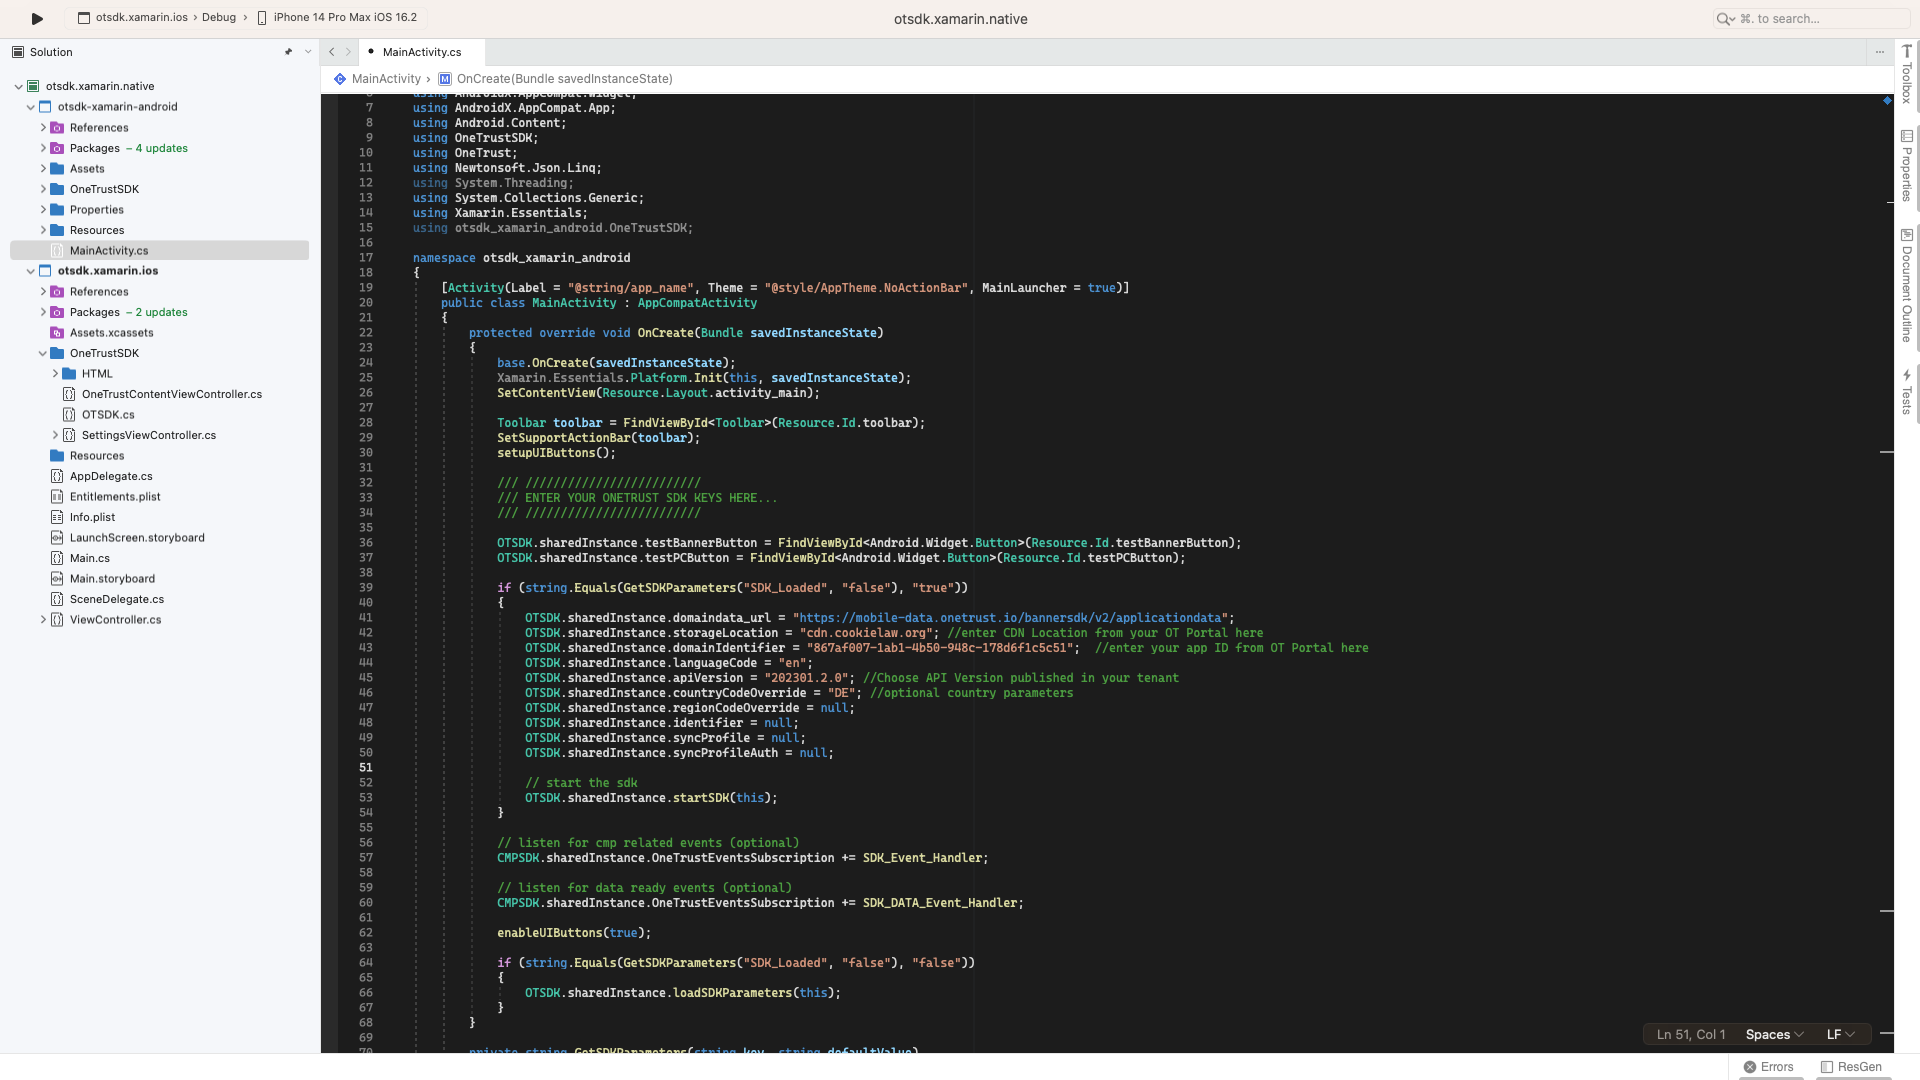
AppDelegate.cs - Xamarin.Android - Navigate to
MainActivity.cs - Xamarin Forms - Navigate to
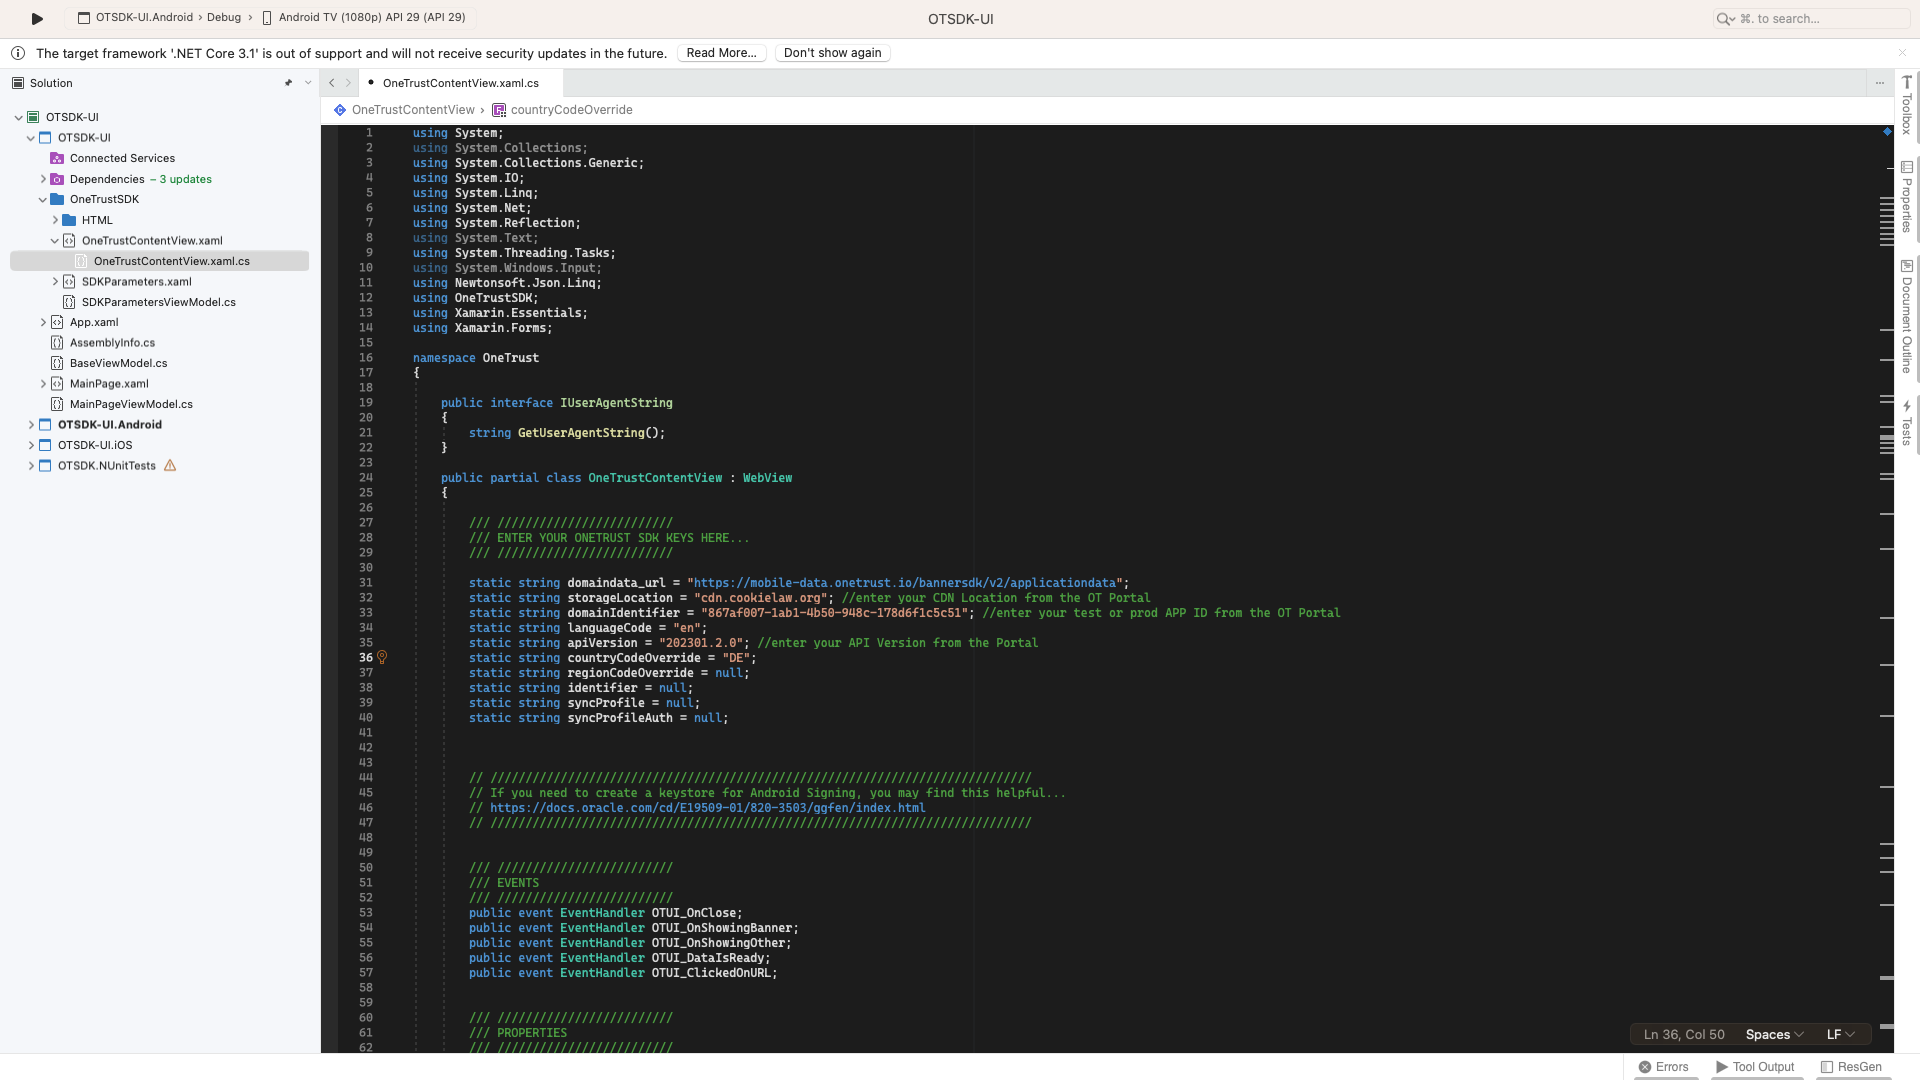
OneTrustContentView.xaml.cs
- Xamarin.iOS - Navigate to
- Look for the comment
ENTER YOUR ONETRUST SDK KEYS HERE - Update the values for each Required key
- Update the values for each non-Required key based on your use case

Xamarin.iOS
Xamarin.Android
Xamarin.Forms
SDK Keys
| Key | Description | Required |
|---|---|---|
domaindata_url | The URL of the application, which is always https://mobile-data.onetrust.io/bannersdk/v2/applicationdata | Yes |
storageLocation | The CDN location for the JSON that the SDK fetches (usually, but not always, cdn.cookielaw.org) | Yes |
domainIdentifier | The Application guid (retrieved from OneTrust Admin console) | Yes |
languageCode | 2-digit or 4-digit (in the case of advanced languages) ISO language code used to return content in a specific langauge. Note: Any language code format which is not listed in OneTrust environment will be considered as invalid input. Note: If the languageCode passed by your application is valid, but does not match with a language configuration for your template, then the SDK will return content in the default language configured in OneTrust environment (usually, but not always, English) | Yes |
apiVersion | The version of the scripts that have been published in OneTrust (eg. 6.11.0) | Yes |
countryCodeOverride | Two-letter ISO 3166-2 country code. | No |
regionCodeOverride | Two-letter state code, used alongside countryCode, typically used for CCPA use cases when providing an experience for California-based US citizens. | No |
identifier | Sets the identifier value used to create a user profile server-side. | No |
syncProfile | Tells initSDKData to attempt Cross Device Consent profile syncing. | No |
syncProfileAuth | Use this to pass the pre-signed JWT auth token required to perform Cross Device. | No |
Override Geolocation
If you would like to explicitly set the Geolocation of the use instead of using OneTrust's computed Geolocation value, set the countryCodeOverride and regionCodeOverride values accordingly.
static string countryCodeOverride = "US";
static string regionCodeOverride = "CA";
Override Data Subject Identifier
The SDK has a setting that will send Consent Receipts to the OneTrust application for reporting, metrics, and dashboards. By default, the OneTrust SDK will generate it's own random identifier to index this consent receipt.
This setting will allow you to override the default random identifier with one that your developers can provide. This can be done before initialization or after initialization.
Before Initialization
// Update the "identifier" key in the OneTrustContentView.xaml.cs file
static string identifier = "myUserId";
After Initialization
// Set the property on the CMPSDK shared object
CMPSDK.sharedInstance.dataSubjectID = "myUserId";
Xamarin Forms Only
Embed the OneTrust Content Viewer
- Identify the
.xamlfile in your application where you intend to display OneTrust UI content. - Paste the following code snippet to that
.xamlfile:
<!-- ONETRUST CONTENT VIEWER START-->
<Frame x:Name="OneTrustContentFrame" HasShadow="true" CornerRadius="8" Padding="0"
RelativeLayout.YConstraint="{Binding OneTrustContentFrameYConstraint}"
RelativeLayout.WidthConstraint="{ConstraintExpression Constant=0, Factor=1, Property=Width, Type=RelativeToParent}"
RelativeLayout.HeightConstraint="{Binding OneTrustContentFrameHeightConstraint}">
  <Grid>
    <OneTrust:OneTrustContentView x:Name="OneTrustContentViewer" />
  </Grid>
</Frame>
<!-- ONETRUST CONTENT VIEWER END-->
Note: The only required entry in the code snippet above is
<OneTrust:OneTrustContentView x:Name="OneTrustContentViewer" />.Your team can decide to modify the
<Frame>and<Grid>elements as needed. We provide them to make the styling look a little nicer.
Configure OneTrust UI Event Handlers
Once you've added the content <Frame> above, you will then need to configure a set of UI event handlers in the code behind (.cs file) in order for the application to show/hide OneTrust views and build out the application logic.
UI Events
| Event Name | Description |
|---|---|
OTUI_OnClose | Fires whenever the UI should be dismissed. It is up to the application to actually dismiss the Frame with the OneTrustContentViewer. |
OTUI_OnShowingBanner | Fires whenever the Banner should be shown. It is up to the application to make the Frame with the OneTrustContentViewer visibile to display a Banner UI. It is also up to the application to decide to listen to the banner layout setting for 1/3, 1/2, 2/3, or Full screen and apply that to the Frame. |
OTUI_OnShowingOther | Fires whenever any non-Banner UI screen should be shown. The reason this is made available is because these views are expected to always show as Full screen, whereas Banner size is configurable. It is up to the application to make the Frame with the OneTrustContentViewer full screen to display a non-Banner UI. |
OTUI_ClickedOnURL | Fires whenever the end-user taps on a web link within the OneTrust UI. It is up the application to pass this to the operating system. |
OTUI_DataIsReady | Fires whenever the SDK finishes initializing. When this fires, all the data is ready and available to display UIs and work with the SDK. In the OneTrust sample app, this is where we check for shouldShowBanner. |
Recommendation: See the
OTSDK-UI / MainPageViewModel.csfile in the sample app for example event handlers of the above events. It's important to read through this file, study it, and understand how to apply it to your specific use case. The application developer has a lot of control on how to go about with the rest of the implementation.
Run Application
- Once completed on the steps above, run the Xamarin application.
- Look at the console for any errors
- Confirm the SDK has loaded properly. You will see
!!! OT SDK READY !!!in the console log if everything configured correctly and the SDK loaded properly. - Once confirmed, proceed to Displaying User Interfaces section for more detail on showing Banner and Preference Center views.
Updated about 1 year ago